
Hello Folks!
Feeling great to be back from this weeny sabbatical. A few days back, I was working with this client of mine who wanted one of their intranet apps to be accessible outside their network. I suggested them to use Azure AD Application Proxy to publish their applications outside their network but ended up being trapped in my own complicacies. They were using Apache Web Server to design and code their web applications and I had no prior experience in publishing any applications other than those that were based on IIS. This haunted me until the day I myself tested publishing an Apache based web application outside the intranet. This blog post is solely fabricated to conclude that your application proxy connector server must have an HTTPS connection to the applications that you intend to publish. See this link for further details–> Azure AD Application Proxy. In the rest of the blog post, I will cover “How to test Azure AD Application proxy with Apache Web Server in your test environment“.
Prerequisites:
- A Microsoft Azure AD basic or premium subscription and an Azure AD directory for which you are a global administrator.
- Two VMs will be required to test this scenario.
On one VM, web application will be installed. This application(here) will be an apache based web application(Apache installation steps shown ahead).
On second VM, Azure AD Proxy Connector will be installed. The Connector maintains an outbound connection from within your network to the proxy service. When users access a published application, they proxy uses this connection to provide access to the application.
Make sure that both the VMs are on the same network and can ping each other.
Note: Make sure your VM on which connector is to be installed is running a Windows Server 2012 R2 or Windows 8.1 or higher OS. - If a firewall is placed in the path, make sure the firewall is open to allow HTTPS (TCP) requests that originate from the Connector to the Application Proxy. Make sure to open all the following ports to outbound traffic:
Port Number Description 80 To enable outbound HTTP traffic for security validation. 443 To enable user authentication against Azure AD (required only for the Connector registration process) 10100 – 10120 To enable LOB HTTP responses sent back to the proxy 9352, 5671 To enable communication between the Connector toward the Azure service for incoming requests. 9350 Optional, to enable better performance for incoming requests 8080 To enable the Connector bootstrap sequence and Connector automatic update 9090 To enable Connector registration (required only for the Connector registration process) 9091 To enable Connector trust certificate automatic renewal
Step 1: Installing Apache HTTP Server Project on Web App Server VM(1st VM):
Since, the Apache HTTP Server Project itself does not provide binary releases of software, only source code.
If you cannot compile the Apache HTTP Server yourself, you can obtain a binary package from numerous binary distributions available on the Internet.
Popular options for deploying Apache httpd, and, optionally, PHP and MySQL, on Microsoft Windows, include:
In this example, we will work with XAMPP.You can download the setup from this link–> Download XAMPP.
After downloading, Install XAMPP Server on your first VM.
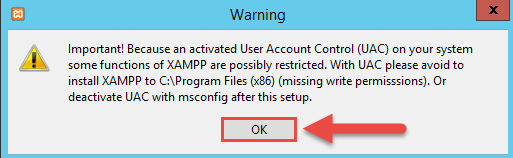
- Click OK on the prompt appeared on double clicking the XAMPP Setup.
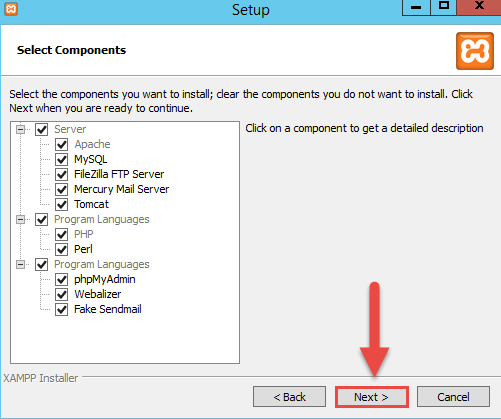
- Choose default settings and click next.
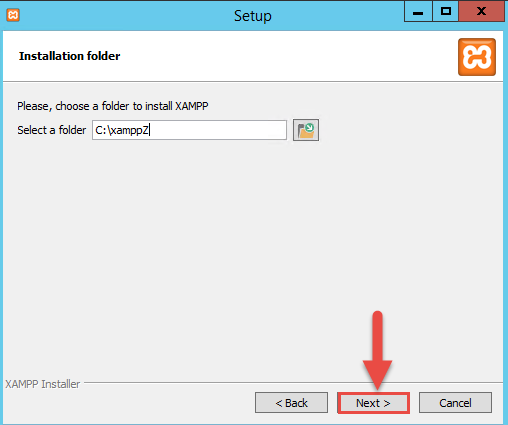
- Choose a desired folder and click next.
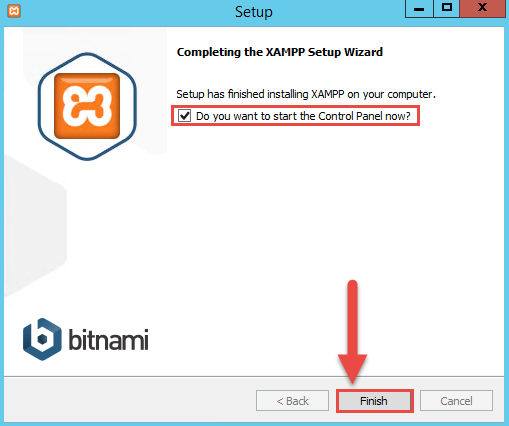
- Follow the setup steps and click next until your installations starts. The setup will start unpacking setup files. After the unpacking is completed, click the checkbox and press Finish.
- This will open the XAMPP Control Panel. Click the start button corresponding to Apache module.
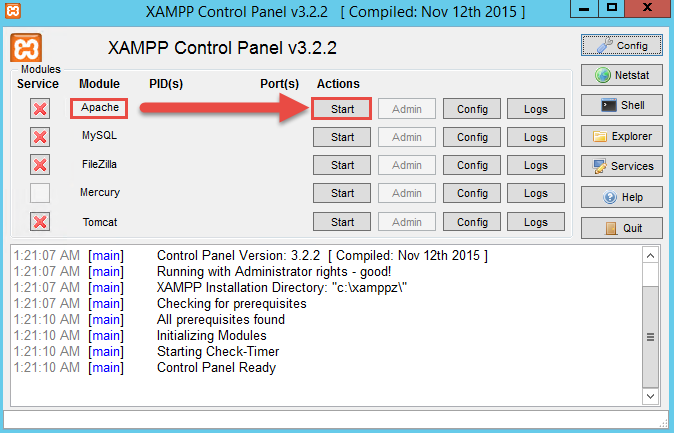
- Close the XAMPP Control Panel. Try accessing the localhost in internet explorer by typing:

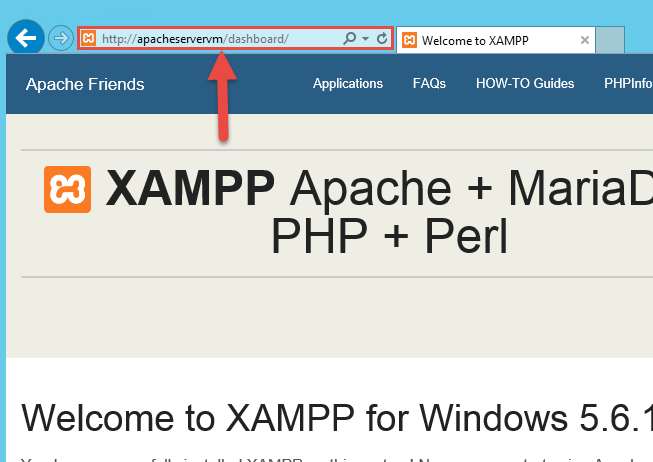
- Now your sample Apache Web Application has been successfully built and published in the intranet. You can confirm this by going to your 2nd VM on which Azure AD connector will be installed. Since these two VMs are in the same network, you can access the Apache web application using internet explorer or any other browser in the 2nd VM by typing:
http://<your VM1’s name>
For example: http://apacheservervm
To know the name of your host, you can go to cmd and type ‘whoami’. - This confirms that your connector VM can send HTTPS requests to Web Server VM.
Step 2: Enabling Azure AD Application Proxy connector using 2nd VM.
All of the following steps should be performed in the 2nd VM on which we will later install the proxy connector.
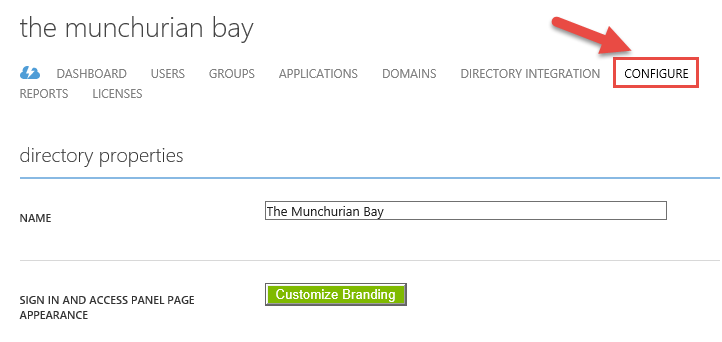
- Login to Azure Management Portal using your Azure credentials or your Azure AD credentials. Navigate to your Azure Active Directory and click on configure tab.
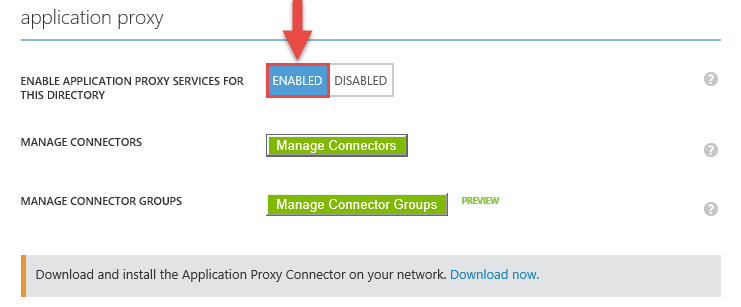
- Scroll down to the application proxy section and Enable Application Proxy Services for the current directory.
Step 3: Installing the Proxy Connector
(To be performed in 2nd VM again)
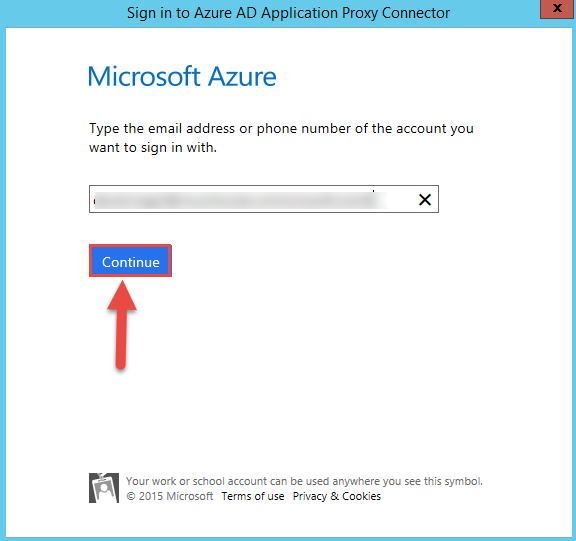
- Download the connector by clicking on Download now button. Save the setup file locally and launch it by double clicking on it. Once the setup starts, you will be prompted to enter the AD credentials. Enter your azure AD global administrator credentials and proceed.
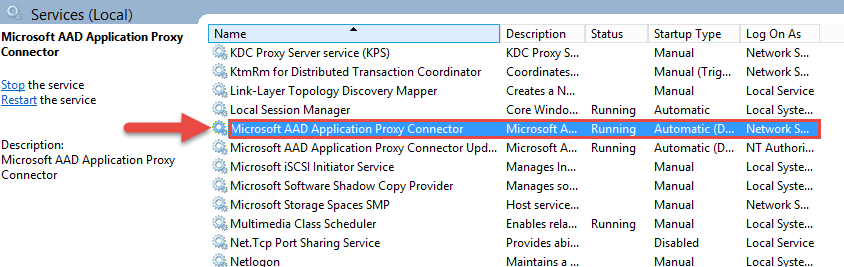
- To confirm whether your installation was successful or not, go to services in the 2nd VM and confirm that Microsoft AAD Application Proxy Connector service is running.
Step 4: Configuring Azure AD proxy connector to point to webserver.
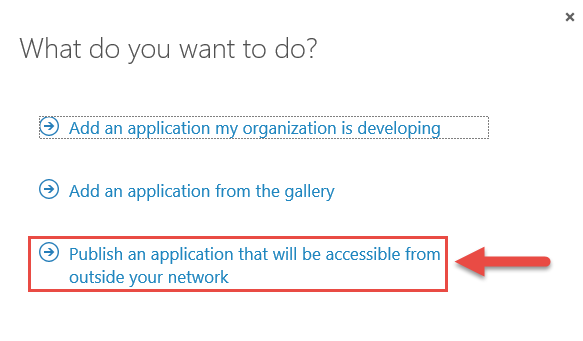
- Go to Applications tab in your Azure AD and click on add ribbon at the bottom.

- Click Publish an application that will be accessible from outside your network.
- Enter the details of the application including the internal URL.
You can choose from two authentication options available. In this blog post, I will be using Passthrough so that app is accessible to any user whether inside or outside of my organization. Click the tick button.
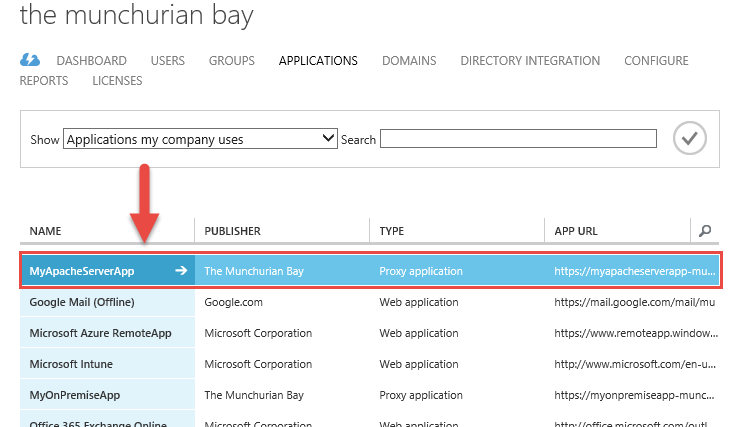
- In your applications tab, choose the application that you just initiated.
- In the configure tab, scroll down and note down the External URL.
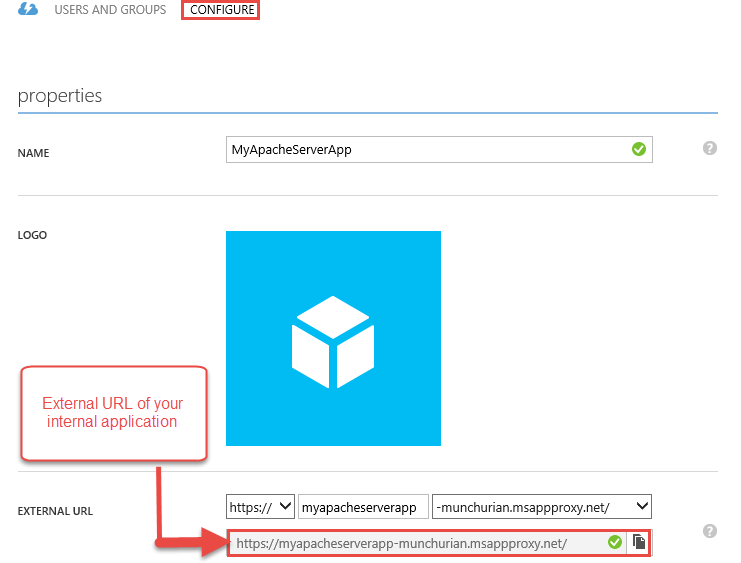
- In any PC whether inside or outside of your intranet, you will be able to access the intranet application using the URL generated in azure portal above.
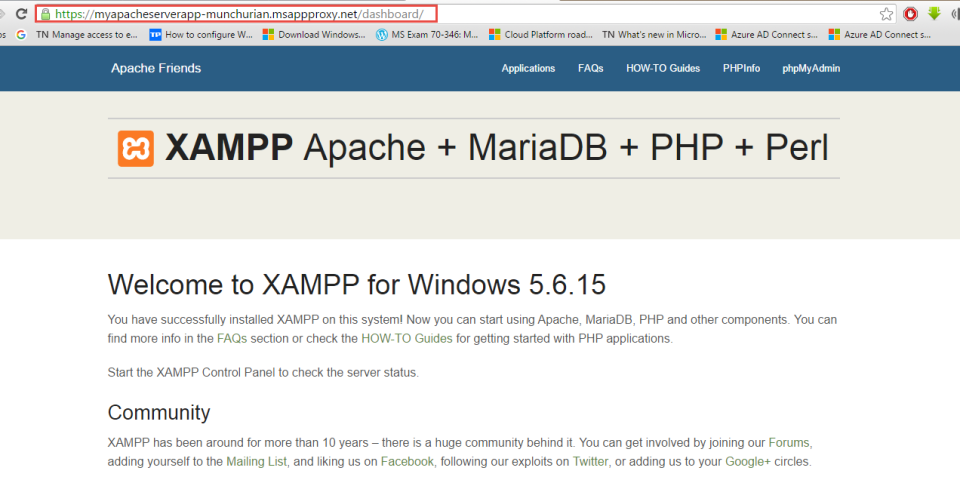
Congrats! You have successfully published your intranet Apache web application using proxy connector.
